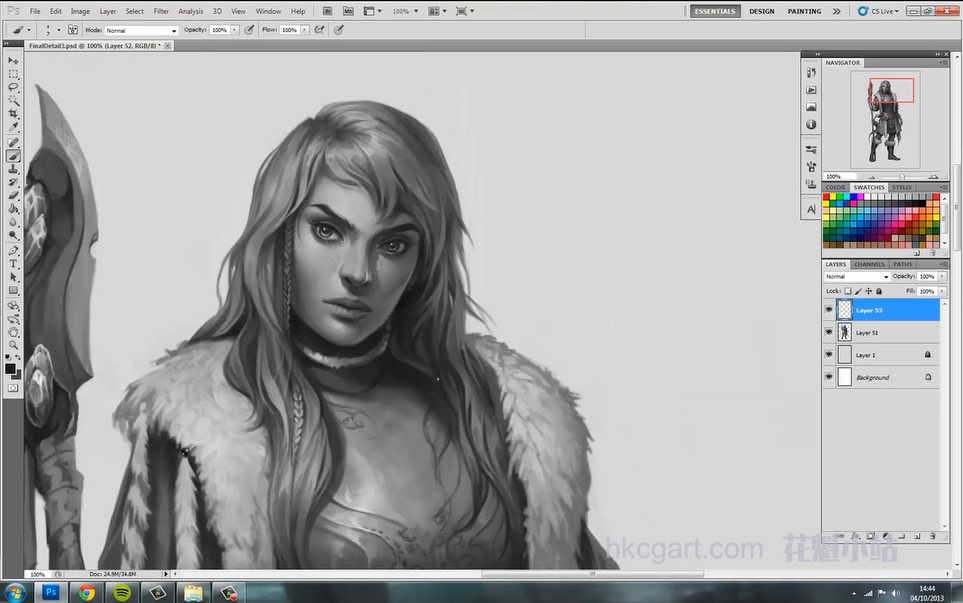
Capture the essence of a character through concept art. I’ll be taking you through the various steps of character creation, from the initial silhouettes through to a final polished design. I will focus on a particular genre of character but feel free to create any character you wish, as the methods can still be applied.
This class is perfect for anyone with a passion for art, from beginners to professionals looking to learn a different approach. This class will take you through the various steps of character concept art, showcasing your range of ability (a perfect portfolio piece for anyone interested in Concept Art!).
通过概念艺术捕捉角色的本质。我将带您完成角色创建的各个步骤,从最初的轮廓到最终的抛光设计。我将专注于特定的角色类型,但随时可以创建任何你想要的角色,因为这些方法仍然可以应用。
这门课程非常适合对艺术充满热情的人,从初学者到想要学习不同方法的专业人士。本课程将带您了解角色概念艺术的各个步骤,展示您的能力范围(对于对概念艺术感兴趣的任何人的完美组合作品!)。
初级教程!
免责声明-软件仅供学习和试用,请于下载后24小时删除,商用请购买正版!
What You'll Learn
Sketch. The first stage of the class is to start sketching out rough thumbnails that focus purely on the shape and silhouette of your character. During this stage I will explain the importance of brush choices / strokes and speed.
Refine. I the next stage of the class we'll begin the process of refining the character. You'll have some pretty rough images from the thumbnail stage and will start cleaning them up and evaluating the design, shape, pose and structure of your thumbnails.
Variation. Standard with almost any character design, for clients in particular, next comes the stage of variation. Rarely will a client want to see a finished design instantaneously, We'll go through the process of picking a refined thumbnail as your starting point and varying the design to create alternatives.
Final Design. In the final stage you'll have chosen your final character design and it's time to add in some detail and really make the character shine.
What You'll Do
You will create a final concept art piece, designing a character of your choice. This will be executed from start to finish, covering all essential techniques and ideas in concept art.
______________
Class Outline
Preparation. You’ll begin this art tutorial by going over the hardware and software character designer Charlie Bowater uses to create client work. Charlie will help you choose your canvas size and which brushes to use. She’ll also give you a tour of her own brush collection, which she established by picking and choosing brushes created by other artists.
Create your thumbnails. You’ll create a character theme to help keep you on track as you design a series of thumbnails. Charlie will show you some of her characters for inspiration before diving into Photoshop, where you’ll watch her sketch a number of rough character silhouettes modeled after the theme of a fantasy-based traveler. At this point in the design process, you’ll learn to avoid getting too detail-oriented, because it will distract from your overall concept. Charlie will teach you some tricks to help you stay away from details and discover “happy accidents” in the early stages of your work.
Refining. The goal of the refining step is to make sense of your rough thumbnail sketches. First, you’ll learn to understand the poses you’ve created and break them down by superimposing stick figure drawings over your thumbnails. Then, you’ll start playing with negative space and adding more detail to your sketches. Remember to use a few of your thumbnails to give you more to choose from later. After all, when it comes to game designing, you’re never going to present a client with just one character design.
Variation. You’ll choose a few thumbnails from the previous step before honing in on one, which you’ll then copy so you can work with three or four versions of the same character design. From there, you’ll be able to experiment with different poses, outfits, hairstyles, and accessories. Charlie will remind you to think about the character’s setting and personality as you do this so that you don’t stray too far from the original concept — an important path to follow in any game design course.
Adding the finishing details. You’ll witness Charlie’s complete process as she polishes her character, adding textures to achieve a grittier look in some places and blending for a softer appearance in others. Charlie will demonstrate her own technique for blending and how she adds contrast to her character, still in greyscale, by establishing a mid-tone and adding shadows and highlights accordingly.
Finishing details: part 2. You’ll see how Charlie creates complex, rich textures like hair, fur, crystals, and even an engraved belt buckle, and she’ll show you how she cleans up all the background mess in her character drawing. In this final stage, you’ll also take a deeper dive into the process of painting convincing highlights and shadows, ultimately creating a character so three-dimensional it could jump right out of your computer screen. Looks like it’s time to move onto a motion graphics tutorial to really get your character moving.


下载说明:
1.花魁原创免费资源和免费教程如压缩包需要解压密码,请手动输入:www.hkcgart.com 。直接复制粘贴网址是会出错的,已下载过的资源请在【个人中心】,【我的下载】里面查找。
2.本站兼容大部分游览器,谷歌,360,QQ游览器等,如果出现下载不了的问题检查的游览器兼容性或者联系本站管理员。QQ:2364468818
3.本站资源共享在百度网盘,下载使用网盘的客户端,这样下载资源才更稳定。(百度网盘客户端下载)
除花魁原创资源外,其他均为会员上传,管理审核通过后即可发布,因为第三方资源链接有效性管理员没办法跟踪和管理,如果遇见资源失效可以举报和补偿,谢谢理解。
早期会员共享资源部分会网盘失效,原因来自于第三方百度网盘,下载早期资源注意资源有效性。
4.如果下载资源没有积分,请在个人中心做下新人任务,或者坚持每日签到就可以获得积分了。
5:资源有效请不要胡乱申请补偿积分,以免被封号处理!谢谢合作!
6:VIP会员获取方式:会员登录后,连续登陆签到1个月可以获得1个月VIP会员资格.也可以通过【会员中心】-【我的钱包】-【冲钻石】 ,购买钻石后使用钻石购买VIP会员资格。
版权声明:本站原创CG视频教程归花魁小站版权所有,未经允许禁止转载和转发,本站有权利追究其法律责任及赔偿,谢谢。
免责说明:本站所有转载资源全部来源于本站会员,仅供下载学习与参考,请勿用于商业用途,下载学习试用后请于24小时内删除,如有条件请支持正版,谢谢。
本站保证站内提供的所有可下载资源(软件等等)都是按“原样”提供,本站未做过任何改动;但本网站不保证本站提供的下载资源的准确性、安全性和完整性;同时本网站也不承担用户因使用这些下载资源对自己和他人造成任何形式的损失或伤害。
根据二○○二年一月一日《计算机软件保护条例》规定:为了学习和研究软件内含的设计思想和原理,通过安装、显示、传输或者存储软件等方式使用软件的,可以不经软件著作权人许可,不向其支付报酬!鉴于此,也希望大家按此说明研究软件!谢 谢!
-QQ交流群-
(花魁官方1号群:226028165)
(花魁官方2号群:283259280 )
(花魁官方3号群:117101712)
(商务对接群:472868013)商务区(发包,接包)+招聘求职
-公众号--
